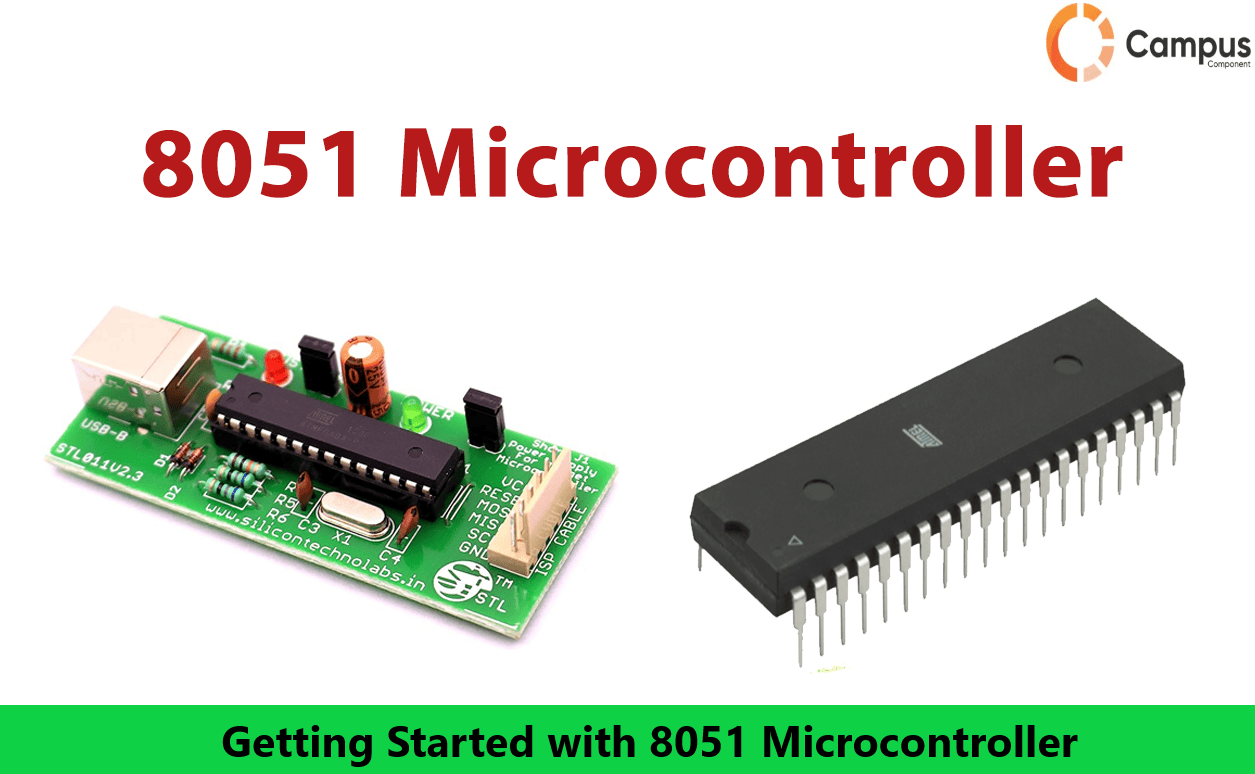
The 8051 microcontroller, also known as MCS-51, is one of the earliest and most used microcontrollers. Intel launched 8051 in 1981. Initially, it was based on N-type metal-oxide-semiconductor (NMOS) technology, but later it was developed using complementary metal-oxide-semiconductor (CMOS) technology. These newer versions were known as 80C51, with the "C" known for CMOS technology.
The 8051 is an 8-bit microcontroller, i.e. its data bus is 8 bits wide, allowing it to process 8 bits of data simultaneously. It finds applications in multiple embedded systems, including robotics, remote controls, the automobile industry, telecom applications, and power tools.
In this blog, we will guide you to get started with making embedded systems projects using 8051 microcontrollers , also we will discuss its architecture, and how to get started with 8051 microcontroller programming and applications.
The 8051 Microcontroller Features
- 8-bit CPU
- 4 KB ROM
- 128 bytes RAM
- 32 I/O pins
- Two 16-bit timers
- Full duplex UART for serial communication
Understanding 8051 Microcontroller Architecture
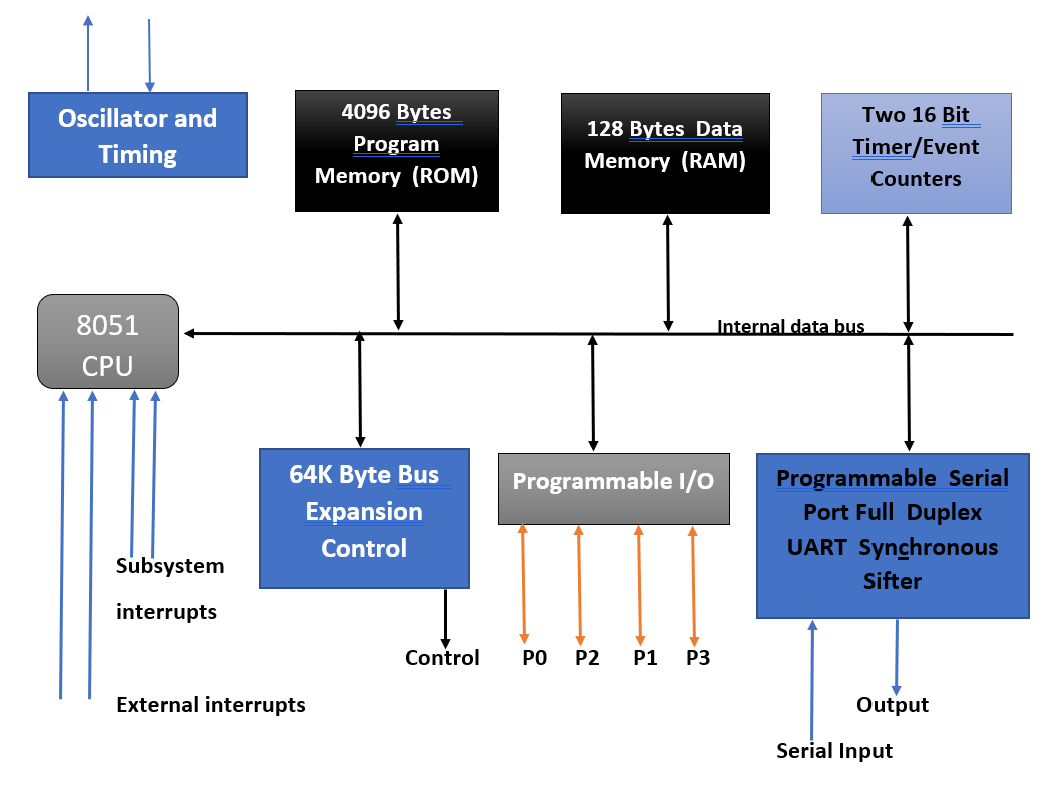
Central Processing Unit (CPU)
Memory Organization
I/O Ports
Timers/Counters
Serial Communication
Interrupt System
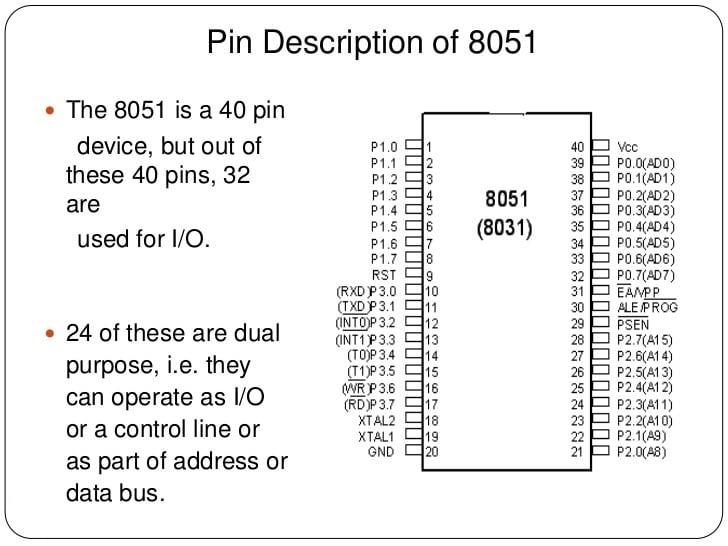
8051 Microcontroller Packaging Types
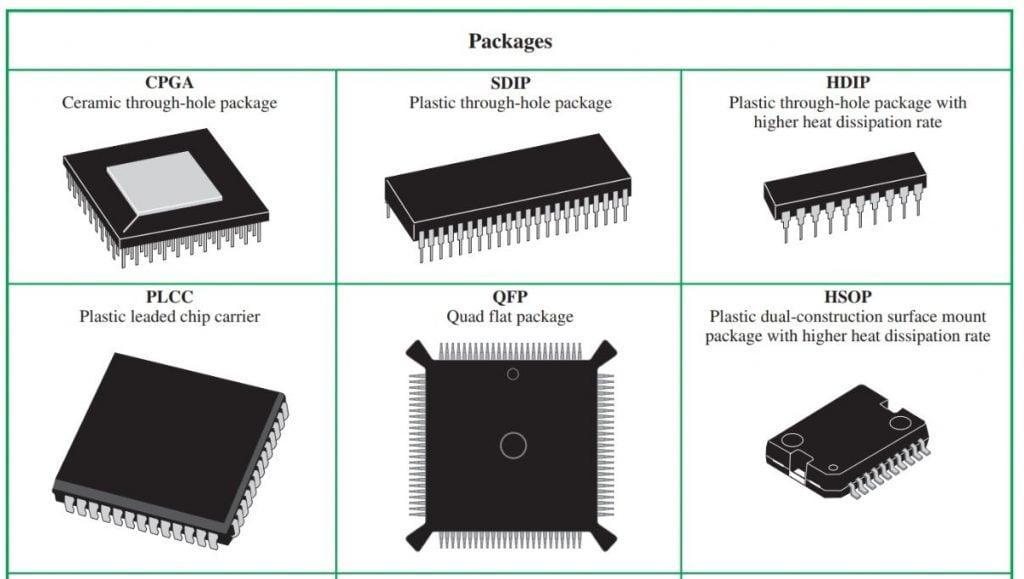
The 8051 Microcontroller is offered in various IC packaging formats. The most widely used and popular packaging is the Dual In-line Package (DIP), typically available as a 40-pin PDIP ( Plastic DIP) IC. Another common packaging type is the 44-lead PLCC (Plastic Leaded Chip Carrier), which is a surface mount package. Additionally, the 8051 microcontroller is also available in a 44-lead TQFP (Thin Quad Flat Package), another surface mount option.
You May Also Like to Read: Difference Between 8051 Vs AVR Microcontrollers
Getting Started with 8051 Microcontroller
Tools and Software
To start programming the 8051, you will need:
- 8051 Development Board: A hardware board with an 8051 microcontroller and necessary peripherals.
- Keil µVision IDE: A popular Integrated Development Environment (IDE) for programming the 8051.
- Programmer/Debugger: A tool to load the compiled code onto the microcontroller.
Setting Up Your Development Environment
Install Keil µVision IDE: Download and install the Keil µVision IDE from the official website.
Set Up the Hardware: Connect your 8051 development board to your computer via the programmer/debugger.
Write Your First Program: Open Keil µVision, create a new project, and write a simple LED blinking pgram in C.


